Object Detection using YOLOv5
Object Detectiong using YOLOv5
I recently finished a month’s long kaggle competition that took me probably a combined 40 hours of work, not including the time it took to run through the code. I attached a link at the bottom of the blog for anyone interested in seeing the project. The problem I had to tackle in this competition was to detect objects in a room from a picture. There were 10,000 training images and 10,000 competition images, so as you can imagine, it took quite a bit of time to run through the code.
Each photo in the competition was a randomly placed camera and angle in a room of a house generated with another program. This gave us models that were standardized, but could be slightly modified to make prediction harder. The goal was to examine each photo and get a confidence level for 38 classes and 5 room types. So we had to train a program to give a confidence level that a chair is in the room and predict if the room is a bathroom or not. To do this, I used a model called YOLO, which is a pre-trained CNN-model that detects objects in a photo and the confidence that the object is in the photo.
I spent many, too many, hours trying to figure out even where to start. With our training images, we were given a datasheet that said what items were in the room and what room it was. We were also provided with metadata for the training images, which colored every class a different shade, so that you could tag the images. There were a ton of problems to tackle and bring together if we were to get accurate predictions.
I started this journey by simply creating and submitting a baseline, which found the frequency of items in an image. For example, chairs showed up in 90% of images, so I just guessed 90% confidence for each model. This gave us our starting point and what we had to outperform.
The first task was to tag each of the images by using the image metadata. We were provided with the color range in RGB for all of the training images, so we converted all the images to their pixels and the amount of color in them. I used the DBScan algorithm in Sci-Kit Learn to find the clusters of each class within an image and saved the relative location to use in YOLO.
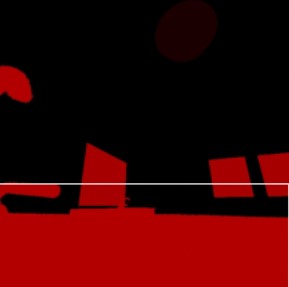
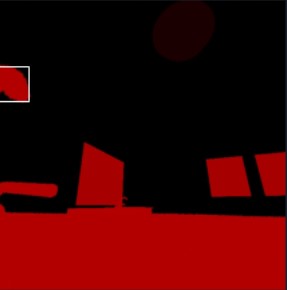
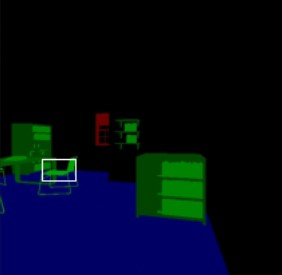
In the above images, you can see the DBScan algorithm at work. In the first two photos, the algorithm finds a faucet, but splits it up into two because it appears outside of the photo. In the second, it finds a chair among a lot of other objects within someone’s office. Overall, it found what it was supposed to with some accuracy issues. After tagging all these photos, we split the training images and their tags into a training and validation set. Below, you can see the results of the tagging process.
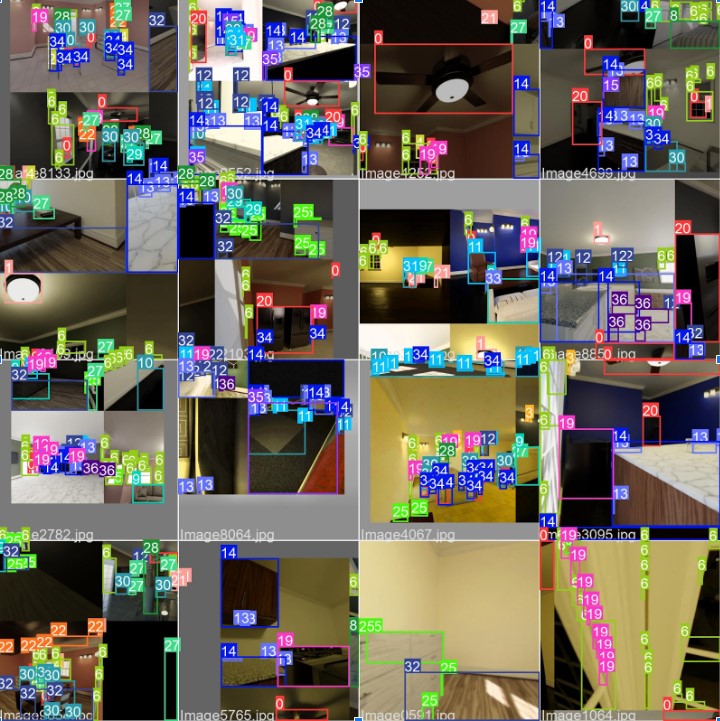
We see here that it does a pretty good job overall of finding various items in the room. However, it often splits them up and tags one item as multiple of the same. We also see some issues where it grabs an item that isn’t there, because the compressed .jpg file blends some of the pixels into a color range for an item that isn’t available. However, we ignored this issue for the time being so that we could get any predictions at all. An alternative to this would be to hand tag images, which, with 38 classes, would be a pain.
After tagging everything and sorting it into our training and validation sets, we trained our YOLO model to recognize our 38 different classes and then tested it on the validation data. We can see those results below.
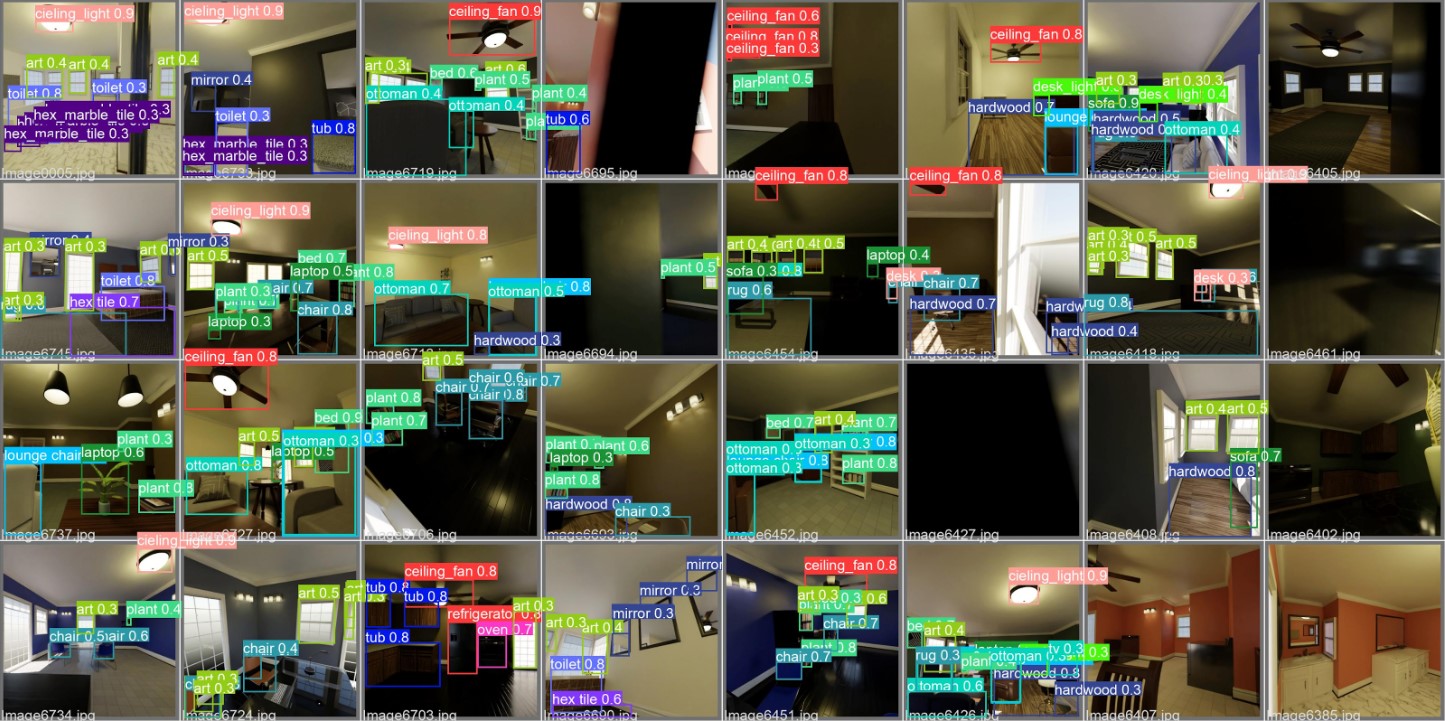
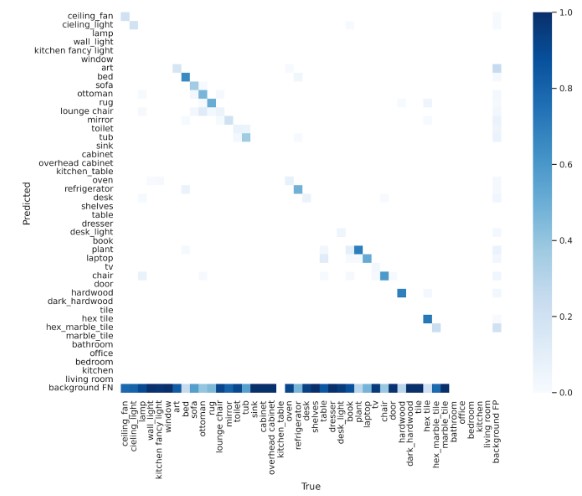
We can see from the two photos above that the model was accurate at predicting certain things, but not so accurate at most other predictions. I think this is just an issue with the data and tagging process, because from looking at the confusion matrix when it found an item, it predicted the right class. It just missed most of the items in the image. I expect that many of the tags were smaller than a whole image and it trained on small subsections of an item. The model worked well at finding ceiling fans and celining lights, but also thought that a plant was a laptop. So, the results were mixed, but better tagging could probably improve it by a lot.
Next, I used this model and imported it with pytorch to run the best model from training and get predictions for the competition images. I took the prediction confidence for each class in an image, and the max if there were more than one prediction for a class, and put them into a dataframe for submission. Then if there were no prediction, I used a default, which I messed around with over time. This default could be 0.1, 0.18, or even the average from the baseline model. I experimented with this until I got the best submission.
After going through this entire exercise and submitting it, I never actually got my predictions to be better than the baseline. I think a major reason for this was because the baseline had some models that show up a lot (like ceiling fans in 80% of images), but sometimes the confidence would only be 0.6 or 0.8, when the fan is actually there. This could be improved by using a weighting also based on the frequency of objects in the image. I also wanted to implement an XGBoost model that would take the items in a room and then predict what room it was, but never used it because the model was never accurate enough. This led to the room predictions to always be the default.
So I guess the takeaway here, is that sometimes the baseline is the best model. Or a model is only as good as it’s training data. Or maybe there’s no lesson at all, but hopefully you learned something by going through my mistakes. The code that I used for the project can be found here instead of github like normal. I apologize for the sloppiness of it, but I was really focused on getting something that works and didn’t have a lot of time to make it prettier.
This was a fun project and I’m glad I took the time in to learn more about YOLO. It seems like a great model for object detection and I’d highly recommend learning more about it if you’re working on a similar project.

Comments